As a developer, you use lot of third party libraries to simplify iPhone/iPad mobile app development. There’s great possibility to add multiple libraries in a single app and managing these libraries become open can of worms. It can also be difficult to find and update a library to new version especially if several libraries need to be updated together.
CocoaPods could be life saver to overcome this problem. It helps in fetching library source code, resolve dependencies between libraries, and even create and maintain the right environment to build the project with the minimum of hassles.
What is CocoaPods ?
CocoaPods is a dependency management tool widely used for iPhone/iPad mobile app development making project easier and manageable. Instead of downloading library code from GitHub and copying it into project (and thus making future updates difficult), you can let CocoaPods do it for you.This tutorial explains how to work with CocoaPods.
Let’s start using CocoaPods in iPhone/iPad mobile app.
Install CocoaPods. CocoaPods runs on Ruby, yet that’s the only dependency it has. Fortunately, all recent versions of Mac OS X (since OS X 10.7 Lion) ship with Ruby already installed. So all you need to do is update RubyGems (just to make sure you have a recent version).
To do so, open Terminal and type the following command in the terminal:
sudo gem update
Enter the system password if requested in terminal. Output will look something like image below.
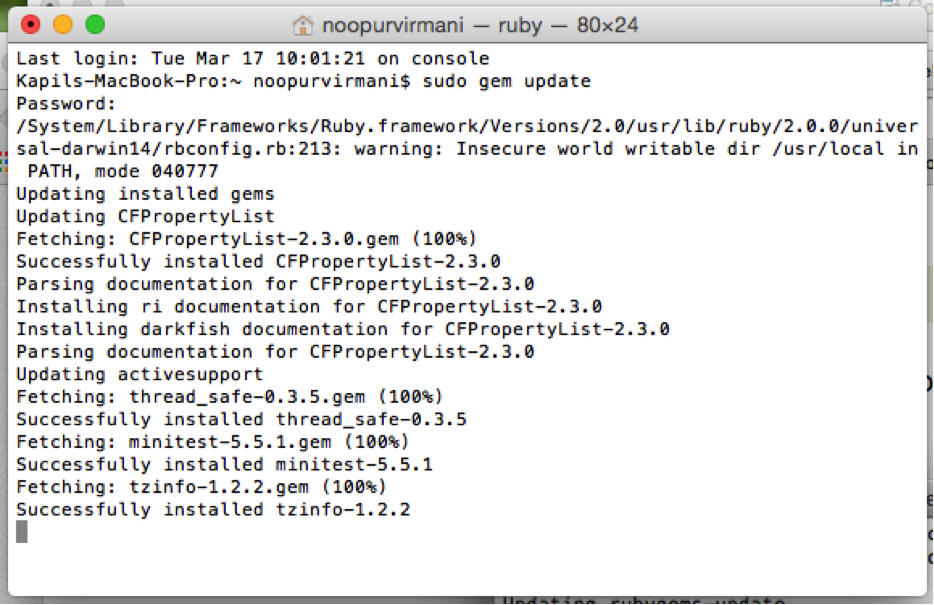
This update may take a little while, so be patient and give it a few minutes to complete. When rubyGems is updated ,write below command in terminal to install the CocoaPods.
sudo gem install cocoapods
Enter system password again if requested. Output will look something like image below.

Lastly, enter the command below to complete the CocoaPods setup.
pod setup
Pod setup will also take a while as above command clones the CocoaPods Specs repository into ~/.cocoapods/ on the computer.CocoaPods setup is now completed.

Managing iOS mobile app using CocoaPods ?
Suppose you want to use SDWebImage library (Asynchronous image downloader with cache support) and AFNetworking library (delightful networking library for iOS and Mac OS X) in the project say ‘ExampleProject’ .
Open Terminal and navigate to the directory containing your ExampleProject project by using the cd command:
cd ~/Path/To/Folder/Containing/ExampleProject
Next enter command :
touch podfile
This will create default Podfile for your project. The Podfile is where dependencies of the project relies on are defined.To open Podfile using xcode for editing write below command
open -e podfile
It’s finally time to add dependencies using CocoaPods.As in our example project SDWebImage and AFNetworking framework is needed.Write below lines in the podfile.This will tell CocoaPods to include sdwebimage and afnetworking libraries as dependencies of the project
pod 'SDWebImage', '~>3.6'
pod 'AFNetworking', '~>2.4'
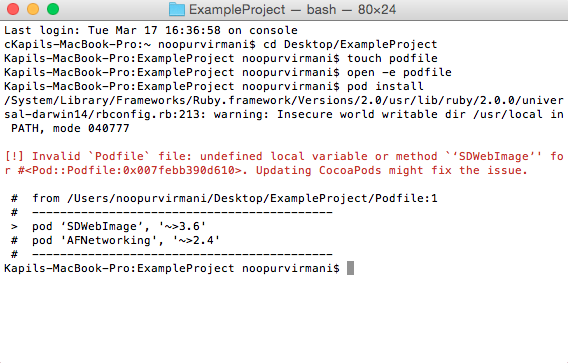
Note: Make sure you use correct apostrophe.If you use apostrophe as used in below command
pod ‘SDWebImage’, '~>3.6'
then, there’s a possibility of getting result as shown in the image below.You can use xcode editor to edit podfile.
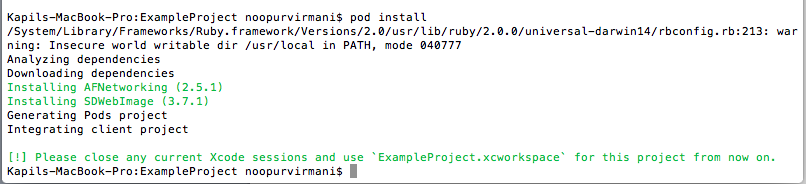
Save and close the podfile. Now enter the below code in the terminal (making sure that you’re still in the directory containing the ExampleProject project and podfile):
pod install
CocoaPods will analyse the dependencies listed in the Podfile and download the libraries into project named ExampleProject which is placed in a created Xcode workspace named ExampleProject.xcworkspace. You will receive a message in the terminal telling you to use the new workspace.You ‘l get similar output as shown in the image below.
If you had your project open in Xcode, close it and open the workspace instead. If you try to run the old project, it won’t build. You will receive a linking error message.The workspace will have two projects – your project (ExampleProject) and the Pods project. In the Pods project is a group folder with your downloaded pods. You can now use the libraries in your app. Remember to add the import before calling any of the framework’s methods.
Remove/Add pod from the existing Pod
To remove a pod from your project, remove it from the Podfile and run pod install. Same goes for adding a new pod.
Update pod from the existing Pod
Update Project dependencies by entering below command in the terminal
pod update
Conclusion
CocoaPods is a tool that makes managing libraries in the iPhone/iPad mobile app developement much simpler. It saves lot of effort,space and time when dealing with dependencies in the project as it makes adding, removing and updating libraries easier. To learn more you can read from the CocoaPods Guides.